February 17, 2019 By: David L. Morrill @ Mototique Racing
Ocala, Florida
I have been busy the last few weeks, preparing Rat Racer, my 1921 Harley-Davidson racer for the upcoming Sons of Speed Races on Saturday March 9th, @ the New Smyrna Speedway. Friday morning, my lovely wife Kim received a message from her friend Tammy Albright, asking if we were going to bring Rat Racer to their car show on Saturday. Tammy's husband George is the Marion County Florida Property Appraiser, and each year they sponsor a huge car show at the McPherson Complex just up the road from out house. I had to admit I had forgotten about the event but told Kim to tell Tammy we would be there.
Saturday morning, I scurried around getting Rat Racer presentable, and my friend Joe Niles rode over to help me load the bike, for the two-mile trip up the road to the show. When we unloaded Rat Racer, we realized we had left the stand in my garage, so I ran back to the house, while Joe sat on the bike.
There were only a handful of motorcycles on display, including Rat Racer, and Joe's Ultra Classic Harley-Davidson, but the McPherson Center parking lot was filled with about 200 antique, classic, and custom cars. I did manage to get a short video of our end of the show.
We spent the rest of the day starting Rat Racer for the crowds, and letting folks get their picture taken on both our bike. Kim showed up, and we finally got her photo sitting on Rat Racer.
Joe's friend Stephanie showed up with her dog Dura and got her photo on both bikes.
There's a little surprise waiting for anyone sitting on Rat Racer. They look down and see Captain Cockroach, Ocala's fastest cockroach, our Mototique Racing mascot on the tank. It's a blast to watch folks' reaction to him!
I got a trophy for best motorcycle, which really should have gone to Joe's Ultra Classic.
Once again, it was a great event which raised money for local charities. A big thank you to George and Tammy Albright for inviting us, and to all their volunteers, and sponsors. Great job folks!
In the previous episode, I shared some inside details of Billy Lane's Sons of Speed races held @ New Smyrna Speedway during 2017 Daytona Bike Week & Biketoberfest. In this episode, I'll share some of the updates made to my 1921 Harley-Davidson blanked off single cylinder racer, known affectionately as "Rat Racer."
Rat Racer - 1921 Blanked Off Harley-Davidson Single
Michael Lichter @ 2017 True Grit Vintage Bike Show
Chassis:
Between the Bike Week race, and the Biketoberfest race, the only real changes made to the chassis, were to add a set of brass handlebar risers from Faber Cycle, along with a set of Billy Lanes Choppers Inc. 1" board track handlebars. This allows me to adjust both the handlebar height & angle for comfort.
I also added a kill button, and a compression release, to the left side of the bars. A Biltwell throttle assembly from J&P Cycles along with a modified stock throttle cable gives a self-closing throttle for safety.
Motor:
My 21J motor is numbered in the mid 3400s of a total production of 4526 - 1921 Model J 61ci V Twins. It has been blanked off by removing the rear cylinder creating a 30.50ci-500cc single race motor. It uses a 1924 iron piston & rings.
Left Side
I shared the basic set up of the bottom end of this motor in Episode #8. The female 21J rod was replaced by 1924-29 model J/JD drilled rod, which is longer than the stock 1921 J model rod.
Add caption
The longer rod had another advantage. While not changing the motor's stroke dimension, it does push the piston up to with 1/16" of the top (photo below) of the cylinder bore at top dead center. The stock 21J rod stops piston travel about 3/8" below to top of the cylinder bore, which greatly limits the compression ratio and performance. The longer late model rod solves that problem.
Through the Intake Valve Pocket
Exhaust valve at the top, Piston Crown at the bottom
I am currently running a standard 21J - 4 lobe cam, with a set of modified cam followers for a blanked off single found by Terry Marsh. I hope to have one of Matt Walksler's race cams installed for the next race.
Standard 21J Cam with Modified Cam Followers
Intake:
My motor uses a standard 21J Intake Pocket, which has been slightly ported to remove the sharp edges, which impede gas flow. It has a stock intake valve, with a 1923-29 conical intake spring & collar supplied by Competition Distributing. The Intake valve spring is shimmed 40 thousands of an inch to increase spring pressure. A stock exhaust valve was used, along with a stock style exhaust valve spring also from Competition distributing. I am in the process of replacing the exhaust valve spring with a heavier spring from Matt Walksler of Period Modified.
Hood Intake Tower - Left 1923 Conical Spring Vented Intake Tower - Right
I have two different intake towers I've used. One is aftermarket prototype make by George Hood, and the other is a later model vented tower for the conical spring. Both towers use the ball end JDH style intake push rod.
Carburetion:
Carburetion has been the single biggest challenge of this project. I went through several period Schebler & Linkert carburetors, with little success, and one carburetor fire. Most were for twin cylinder bikes and could not be leaned down enough to perform well through the whole throttle range.
When I toured Billy Lane's Choppers Inc. and examined his Sons of Speed racers, I found he was using modern carburetors, so I decided to give them a try. The first Mikuni VM32mm was too large and lacked mid-range performance. I then settled on a round slide Mikuni VM26-606 carburetor setup for a small bore 4 stroke dirt bike.
Rubber Mounted Mikuni VM26-606 with K&N Air Filter
While tuning is still a work in progress, the current carburetor specs are:
190 main jet, 22.5 pilot jet, Air Screw 1.2 turns out, 1.5 slide, O-O Needle Jet, 5E75 Needle on the middle notch.
With this setup, the motor starts easily, idles smoothly, picks up rpm, when the ignition is advanced, and pulls well through the rev range. The carburetor is rubber mounted with a piece of high temp water hose and has a K&N air filter installed.
Lubrication:
The stock 21J cast gear case cover/oil pump was replaced with the stamped steel gear case cover/cast oil pump introduced in late 1922.
1922 Stamped Steel Gear Case Cover & Cast Oil Pump
Ignition:
I have used a total loss battery powered ignition system for many years now. It used a 1925 timing case with original points, powered by a small 12-volt Security System sealed battery. My most recent update was to replace the original points with a Gotronic Electronic Ignition. The points were replaced by a magnetic sensor, that triggers a small control box. A Dyna 12 Volt Single Wire Coil provides the spark. Ignition timing is set with the timer at full advance 9/16" - 40 degrees Before Top Dead Center. The small green LED light on the top of the control box signals the triggering of the ignition as the timing lobe passes the sensor.
Modified 1925 Timer & Gotronic Ignition Control Box
These are the modifications I've used over the past few years. All seem to have worked out well on the street & track, so far!
A short ignition test video below:
Epilogue:
For the 2019 Races, I switched to a more period LinkertM741 carburetor, which features both High and Low Speed mixture adjustment. Works great!
Suppliers: Biltwell Inc. - J&P Cycles Destination Daytona - Ormond Beach, Florida Choppers Inc. - Billy Lane - Daytona Beach, Florida Competition Distributing - Sturgis, South Dakota Gotronic Ignitions - Gelu Olaru - Romania
Period Modified - Matt Walksler - Waynesville, North Carolina
Rat Racer at the Rat's Hole Bike Show at Ocala, FL. Bike Fest
Photo by Julius Williams
Well, it's been about a year since I have given an update on my 1921 Harley-Davidson replica racer, which I call "Rat Racer." It's always a continuing work in progress, with several changes since I last wrote about it in Episode 29. To start with, it made an appearance in the Rat's Hole Bike Show at Ocala Bike Fest this past July. Teddy Smith, and his staff at the Rat's Hole do a first class job and were great folks to work with.
The day of the show, a photo of me sitting on Rat Racer appeared in the Ocala Star Banner article on Bike Fest. Pretty cool!
We were lucky enough to walk away with a win in the Pre 1935 Antique Bike Class and received a great plaque designed by Teddy Smith.
Rats Hole Bike Show Plaque
By Teddy Smith
With the bike show commitment completed, I could concentrate on converting Rat Racer to ride on the street. There were several problems to solve, including working brakes/clutch, and a better carburetor. I tackled the carburetion problem first. Over the past few years, I have tried both period Schebler & Linkert carburetors. The problem was neither could be leaned out enough to use on a single cylinder bike. I finally decided to go with a 1970s era 34mm Mikuni VM carburetor. Yeah, I know it's blasphemy to use a modern Japanese carburetor on a 95-year-old Harley-Davidson. Funny thing is, before switching over to fuel injection, all the modern carbureted Harleys used Japanese carburetors.
The Mikuni, being a much more modern carburetor, has several advantages. First, they are relatively cheap, especially compared to period alternatives. Second tuning parts are readily available and reasonably priced. Finally, I am very familiar with tuning these Mikuni carburetors from my AMA road racing days. With a little tuning, the engine ran strong throughout the rev range with the Mikuni.
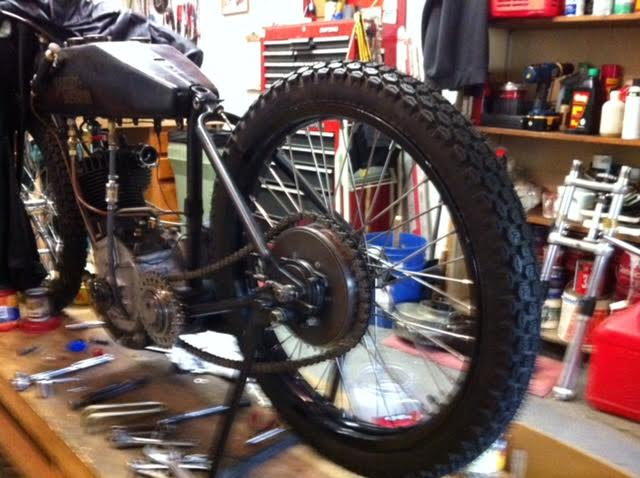
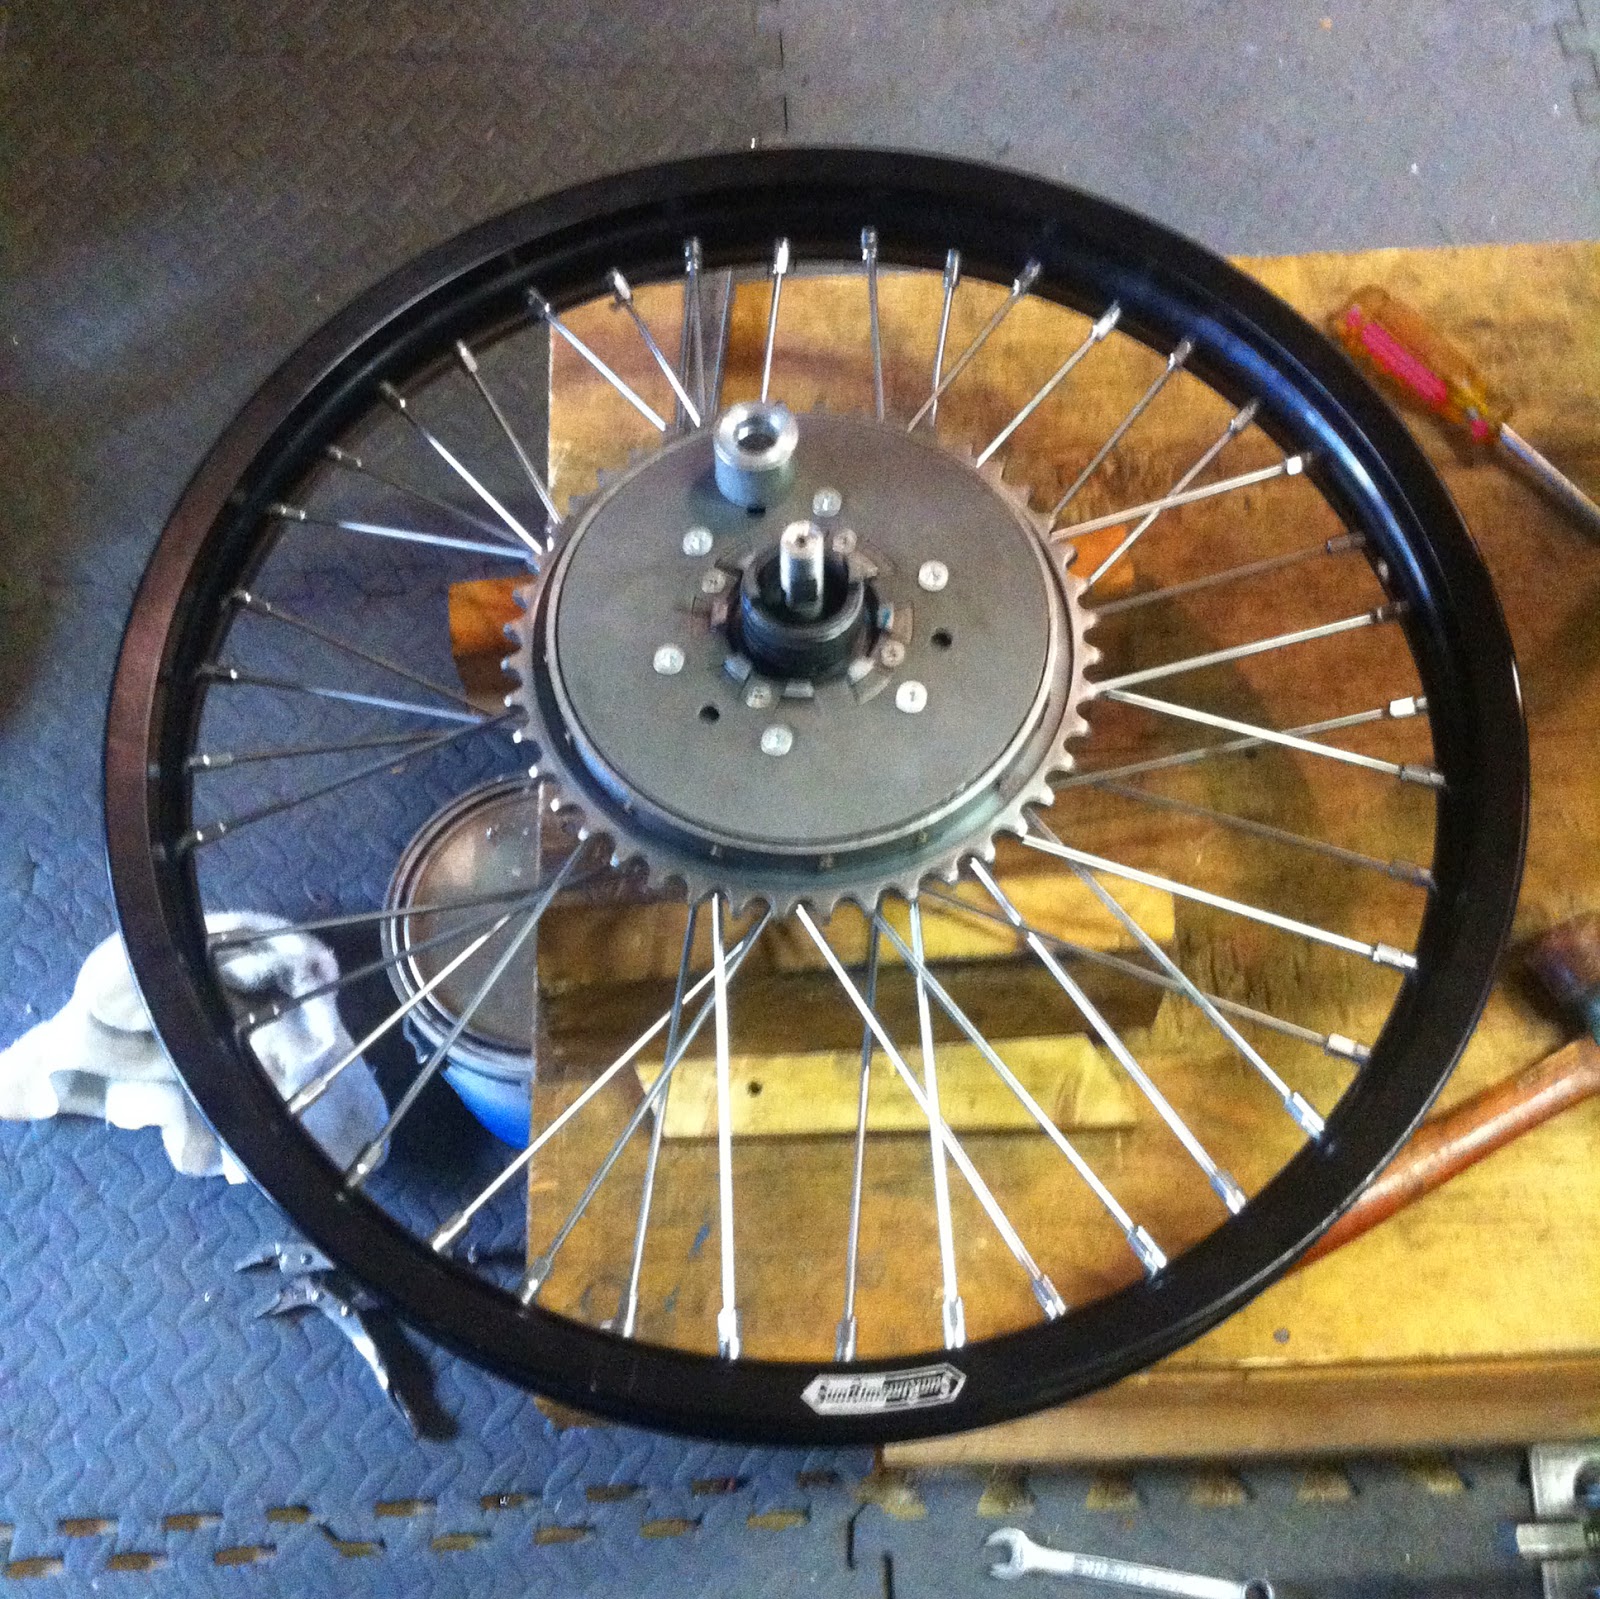
The next problem was a working brake. The rear wheel assembly with the Free Wheel Clutch assembly I am using, also comes with a period style drum brake on the right side of the hub. The trouble is the hub assembly with the clutch and brake, would no fit my racing frame. I opted to use the hub with the clutch assembly and find an alternative brake for the front end. This required a pretty significant offset in the lacing of the rear wheel to get the tire aligned with the centerline of the frame, but after a few hours of painstaking adjustment, everything lined up.
Free Wheel Clutch Rear Wheel After Alignment
After some time searching Bay, I located an early 80s Kawasaki dirt bike front wheel with a small drum brake.
Front Wheel Assembly with Drum Brake
With all the major problems solved, it was time for a road test.
Rat Racer Road Test - November 6, 2016
Lee Merkel Field - Sylacauga, Alabama
The bike ran very well, reaching about 55pmh, tracking straight, the plug reading was good, and the front brake worked superbly. Mission accomplished!
Rat Racer - Road Ready
Sources: Deadly Dave's Collection Ocala Star Banner Julius Williams
There's an old gambling expression that goes "Let it ride." This denotes letting all your winnings ride on the next bet. That expression pretty much sums up the theme for this episode.
It's been a while since I wrote Episodes #8, and #13, on building my 1921 Harley-Davidson replica racer. These two technical episodes get more page views than any of my history episodes.
While I have done a couple of updates on these earlier episodes, I've decided to start a new continuing episode on upgrading my racer.
Like most of my projects, this one begins with the delivery of a box. One day my wife told me I had a large box from Europe sitting in the garage. I'd been waiting for it for a couple months and was excited to see if it would work. Once I got the box down to my shop, and unwrapped, my earlier suspicions about the amount of work this conversion would take where confirmed.
The Mystery Box
For the most part, early Harley-Davidson racers, came without clutches, transmissions, or functioning brakes. That makes them nearly impossible to ride, except on the racetrack. I decided to Convert my racer so it can be ridden at antique motorcycle events, which will require a working clutch, and brake.
In 1912, Harley-Davidson introduced a single speed clutch built into the rear wheel hub. Known as a "Free Wheel Clutch", it allowed riders the ability to have the engine running, while the bike was stationary. This clutch setup was also an option for the factory produced racers.
Harley-Davidson Free-wheel Control Ad Motorcycle Illustrated - 1912
Replica Freewheel Clutch
When I compared the clutch setup I received, to the space between my frame's rear axle plates, I realized it would not even close to fitting my frame. I had been assured it would bolt on, but there was no way if would fit, as it was too wide. Fitting it to my frame would require removing the right-side drum brake, and re-machining the rear hub width to narrow it. Guess I should have listened to that little voice, told me not to go down this path.
I checked the function of the clutch assembly, and it worked fine. Several folks familiar with the overseas supplier, had warned me it would be a waste of time, to try and return it for a refund. That meant that I would have to do whatever was necessary to get this clutch to work on my frame.
My weapon of choice in taking on this task, was my leather belt drive vintage South Bend metal lathe. I think my wife's grandfather bought this lathe for the family lumber mill sometime in the thirties or forties. A few years ago, I became the caretaker of this family mechanical heirloom.
My Belt Drive South Bend Metal Lathe
I've never claimed to be a trained machinist, so this project really tested my machining skills. Most of what I learned about operating a metal lathe, came from watching my grandfather, who was a master metal worker all his life. After countless hours of measuring, and lathe work, I was able to fit it in the space available, and the clutch worked properly.
Clutch fit to my Keystone Frame
When my machine work was complete, and the clutch was fitted, it was apparent that the center line of the new rear hub, would not line up with the frames center line. This was caused by the worm gear clutch activator on the left side of the hub. The width of this mechanism could only be narrowed slightly, and still function. I would not be able to determine just how much the rear wheel was of center until the rear wheel had a rim laced to it, and tire mounted.
Lacing and truing spoked wheels is an acquired skill best left to professionals. I usually use Buchanan Spoke & Rim to build my spoked wheels. They did the original wheels on my racer, but that was not really an option in this case. I have only laced, and trued, a couple of wheels in my time, but that was many years ago. My first mistake was not photographing my original rear wheel before disassembling it for the spokes & rim. I laced, and re-laced, the rear wheel countless times, before I finally got it right. Pretty much, what I remembered of lacing the first spoked wheel 43 years ago!
Finished Rear Wheel Ready for Truing
The next step is truing the rim. This twostep process, and starts with horizontal truing, which allows the wheel to run true side to side.
Horizontal Wheel Truing
Once the wheel runs true horizontally, it's time to concentrate on vertical truing, which allows the wheel to run true, with no up and down hop.
Vertical Wheel Truing
After a couple of hours, everything was running true. Now comes another fun part. Mounting a modern tire to a 1.85" rim, without pinching the tube, is a real art. After about an hour of flying tire irons, and a more than few choice words, the rear tire was mounted, and held air.
Completed Freewheel Clutch Rear Wheel
With the rear wheel setup completed, my next task was to fabricate a clutch lever to activate the rear wheel clutch. I had previously ordered the rod that connects the clutch lever to the clutch, but the casting that mounts the clutch lever to the frame's seat support tube, is no longer available. After some trial, and error, I came up with a mount for the lever.
Clutch Lever in the Drive Position
Pushing the lever forward engages the clutch and drives the rear wheel. Pulling the lever back disengages the clutch, allowing the rear sprocket to spin on the rear hub, without driving the rear wheel. A quadrant gate on the lever mount, controls the available lever travel, and a spring-loaded tensioner holds the lever in place at either the drive, or non-drive setting. This video, shows the rear wheel clutch function with the engine running:
Live Engine Clutch Test Video
Now that all the fabrication was dome, and the rear wheel was mounted to the frame, it was time to determine how much the rear wheel was off from the frame's center line. This was done by checking the front and rear wheel alignment using a 6' long piece of angle iron as a straight edge.
Rear Wheel Alignment Check
The final verdict is the rear wheel is off center to the right around 3/8 of an inch. Really not as bad, as I first thought.
Front Wheel Shows a 3/8" Rear Wheel Misalignment to the Right
So, what lessons did I learn from this experience?
This has by far, been the most expensive motorcycle project, that I've ever built. Adding the clutch contributed significantly to the total cost and time involved in this project. I was also warned by people in the know, that the clutch supplier had problems, and that using his clutch would involve a lot of work. That was true, and knowing what I know now, I would probably not do it again. I've said before that building replicas of these old racers is not a job for amateur builders. This episode confirmed that. But in the long run, it will all be forgotten with the first blast down the road, and that's really what it's all about!
American board and dirt track motorcycle racing of the teens and twenties was one of the most exciting sports of that period. Large crowds were drawn to racetracks throughout the country to see daring riders cheat death. This early period of racing continues today. The Antique Motorcycle Club of American events at Davenport, Iowa and Wauseon, Ohio feature both period and recreations of these early racers competing on dirt tracks.
Deadly Dave's 1921 Harley-Davidson Racer
In part one of this story, I detailed modifying a 1921 Harley-Davidson Model J V twin engine into a blanked off single cylinder short track motor. When I set out to assemble an early racing chassis for this engine, my intention was not to build an exact replica of a 1921 racer. Some components have been replaced modern pieces for practicality and safety.
Harley-Davidson 11-K Factory Racer
When Harley-Davidson entered the racing game in 1914, they took their existing F Model V twin bike and modified it to the 11-K racer. The 11-K racer featured a "Short Coupled" racing frame, which was a loop style frame similar to the F Model frame. The racing frame had lower center of gravity, a shorter wheelbase, and was used by factory/privateer riders for several years.
Replica Short Couple Racing Frame
americanmotorcycleracer.com
In 1916 Harley-Davidson introduced a new "Keystone" racing frame. In building this frame, the engineers removed the frame loop below the engine.
Replica Keystone Racing Frame
americanmotorcycleracer.com
The engine was mounted lower in the frame using two steel plates. This made the engine a stressed member, and the lower engine mounting position allowed for better handing. It also allowed the one-piece cylinder/head to be removed with the engine in the frame.
by the early 20s, enough privateer racers, were using modified Model J engines in their racers, that Harley-Davidson issued a factory Shop Dope Bulletin, which included an explanation on fitting 1920/21 engines to the Keystone racing frame. The factory also produced the special spacers necessary to install a production Model J V twin engine in the Keystone racing frame.
Harley-Davidson Service Shop Dope Bulletin # 81 Harley-Davidson Motor Company - November 1, 1920
1921 Harley-Davidson Keystone Frame Racer
Wheels Through Time Museum Collection
The racers of this period had rigid frames, with no rear suspension. They were built either with, or without, front suspension. Bikes like the one above were built with modified version of the F Model springer front fork. There was also a rigid girder style front end used only on racers. This is the style front end I used.
Replica Girder Style Racing Fork
Many of these early racers are direct drive, meaning the engine, is connected directly to rear wheel by two chains. There is not a clutch, or transmission. There is a compensating jack shaft assembly mounted behind the engine.
Compensator Assembly
The compensator assembly consists of two interlocked sprockets with different tooth counts spinning on a bearing assembly with concentric adjustment. This allows for the primary chain tension to be maintained. It also allows the final drive ratio to be altered by changing the sprocket's tooth counts.
The fuel tanks I used are narrow racing versions built for shorter races. The right tank carries several gallons of fuel, while the left tank features both a several quart oil tank, and a one-gallon fuel tank. The front oil tank section of the tank features a hand operated oil pump mounted on the left front.
Replica Narrow Racing Tank
americanmotorcycleracer.com
The rest of the running gear for the frame consists of a cut down 1914 replica rear fender, a Mesinger racing saddle, and wide board track style handlebars. The bars feature a right-hand throttle, and a left spark advance. When I first built the bike, I used a set of period style 28" wheels with clincher wheels and tires. These period style tires do not feature safety beads and held to the rims by air pressure. Many early racers were injured, or killed, by tires jumping the rim after losing air pressure. They also featured hubs with loose ball bearings, which are difficult to assemble and adjust.
Modern 21" Rear Wheel/Tire
The wheels were replaced with modern sealed bearing flat track racing hubs featuring sealed cage ball bearings, modern 21" rims, and safety bead tires. The 21'' wheels are not as tall as the period wheels and the bike only has about 2" of clearance from the bottom of the engine plates to the ground. The racers of this period did not use brakes. There is however, a compression release operated by a lever on the right handlebar.
Cable Operated Compression Release
Pulling the compression release raises the exhaust valve slightly, reducing compression in the engine, and allowing the bike to slow entering turns. It is also useful when push starting the bike.
When I built the motor detailed in Part 1, I tried to preserve as much of the 92 years of patina as was possible. When it came to finishing the frame and sheet metal is chose not to give it a bright and shiny restored look. I decided to use a simple roughed up black lacquer paint job, that was purposely not rubbed out, to give the bike a well-used look. A set of gold period Harley-Davidson tank decals are the only accents.